Object Detection
Object Detection runs a model trained in InSiSo Model Bench on the camera's pictures. It reports every object of the trained classes with its class, confidence, centre and size.
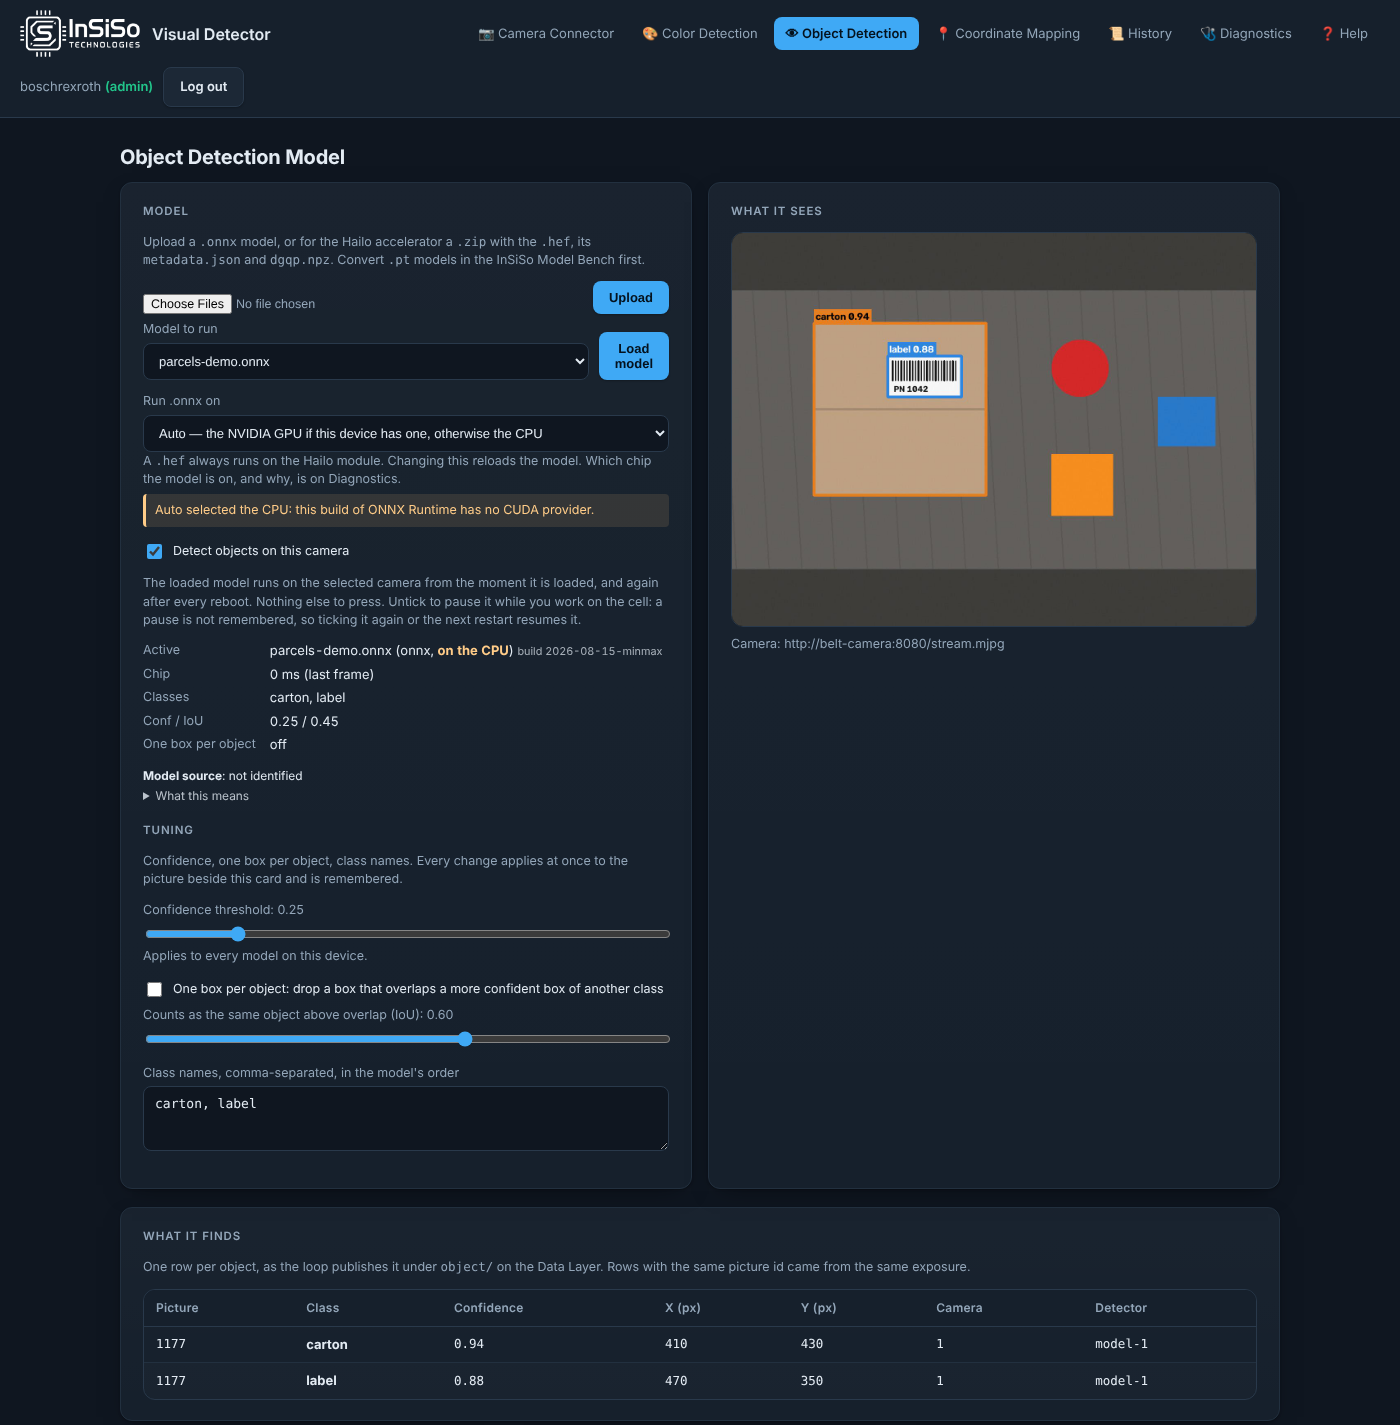
Load a model
- Export the model from Model Bench: an
.onnxfile, or for the Hailo-8 module a.zipwith the.hef,metadata.jsonanddgqp.npz. Convert.ptmodels in Model Bench first. - Under Model, choose the file and press Upload.
- Pick it in Model to run and press Load model.
The model runs on the selected camera from the moment it is loaded, and again after every reboot. Nothing else needs to be pressed. Class names, and the class colours from Model Bench's Manage Classes, travel inside the file. The boxes are drawn in those colours.
Where it runs
Run .onnx on chooses the processor for an .onnx model. The choice is remembered.
| Choice | Runs on |
|---|---|
| Auto — the NVIDIA GPU if this device has one, otherwise the CPU | The default |
| NVIDIA GPU (CUDA) | The NVIDIA GPU; the CPU, with the reason, if it cannot start |
| NVIDIA GPU (TensorRT …) | In 4.7.21 TensorRT is not included, so this runs on CUDA |
| CPU only | The CPU, for example to leave the GPU to another app |
A .hef always runs on the Hailo-8 module. The NVIDIA GPU needs the +nvidia snap (see Which snap). The line under the choice says where the model actually runs and why. Diagnostics ▸ Accelerators has the details.
Pause and resume
Detect objects on this camera switches the model on and off for the camera. Untick it to pause while you work on the cell. A pause is not remembered: ticking it again, or the next restart, resumes detection.
Tuning
Every change applies at once to the picture beside the card and is remembered.
- Confidence threshold: objects below it are not reported. It applies to every model on the device.
- One box per object: drops a box that overlaps a more confident box of another class by more than Counts as the same object above overlap (IoU).
- Class names, comma-separated, in the model's order: renames the classes, for example when the model carries none.
What it shows
What it sees is the camera's latest picture with the model's boxes. What it finds lists one row per object: picture number, class, confidence, centre (X (px), Y (px)), camera and detector. The same values are on the Data Layer under object/, and in machine millimetres under coordinates/ once Coordinate Mapping is calibrated.
Models give upright boxes, so orientation-deg is 0 and orientation-valid is FALSE unless the model predicts corners.
Commissioning tool: run the model on a video file runs the loaded model on an uploaded video, to check a model away from the line.
A camera can run more than one model. Each runs as its own detector (model-1, model-2, …). Add one with the Data Layer command create-detector; see Data Layer commands.
Code Reading
With the Code Reading licence, the app reads the Data Matrix inside each detected box, for example on a parcel label. It reads on the camera's full-resolution picture, after the confidence threshold, so only reported objects are read.
Switch it on per detector with the Data Layer command:
configure-detector {"id": "model-1", "read-codes": true}
code-depth chooses deep (the default, slower and more thorough) or fast. The text read is on the Data Layer in object/code[], at the same index as its object.
3D Dimensioning
With the 3D Dimensioning licence, the app gives each detected parcel's length and width in millimetres, from the four corners of its top face. This needs a model trained in Model Bench with Predict package corners, the camera's mounting geometry, and the parcel's height. The results are on the Data Layer in coordinates/length-mm, width-mm and height-mm.
Draft
In 4.7.21 the parcel height is a fixed assumed height unless a measured height is supplied, and json says which (height_measured). The camera geometry is set up with InSiSo during commissioning. No accuracy figure is given: measure parcels against a tape on your cell.